Définir le thème général de mon site
Personnalisez le titre, logo, polices, formes et couleurs pour assurer une identité visuelle cohérente sur votre site.

Afin de simplifier l’édition de vos pages web et la personnalisation de vos éléments d’apparence, certains paramètres graphiques sont communs à toutes vos pages. C’est ce qu’on appelle le thème général de votre site web.
Suivez ces étapes pour définir le thème général :
Rendez-vous dans l’onglet Site internet > Thème.
Définissez le thème général qui s’appliquera à l’ensemble du site en complétant les rubriques indiquées ci-dessous.
Renseigner le titre principal de mon site
Dans cette zone de texte, renseignez le titre principal de votre site. Ce titre sera visible dans l’onglet du navigateur et dans les résultats des moteurs de recherche. Il doit être court et synthétique.
Désactiver le clic droit sur les pages de mon site
Vous avez la possibilité de désactiver le clic droit sur votre site, ce qui empêche les visiteurs de faire un clic droit sur les pages de votre site. Cette mesure de sécurité protège efficacement votre contenu contre le vol en empêchant les utilisateurs de copier ou de télécharger votre texte, vos images et d'autres éléments essentiels de votre site sans autorisation.
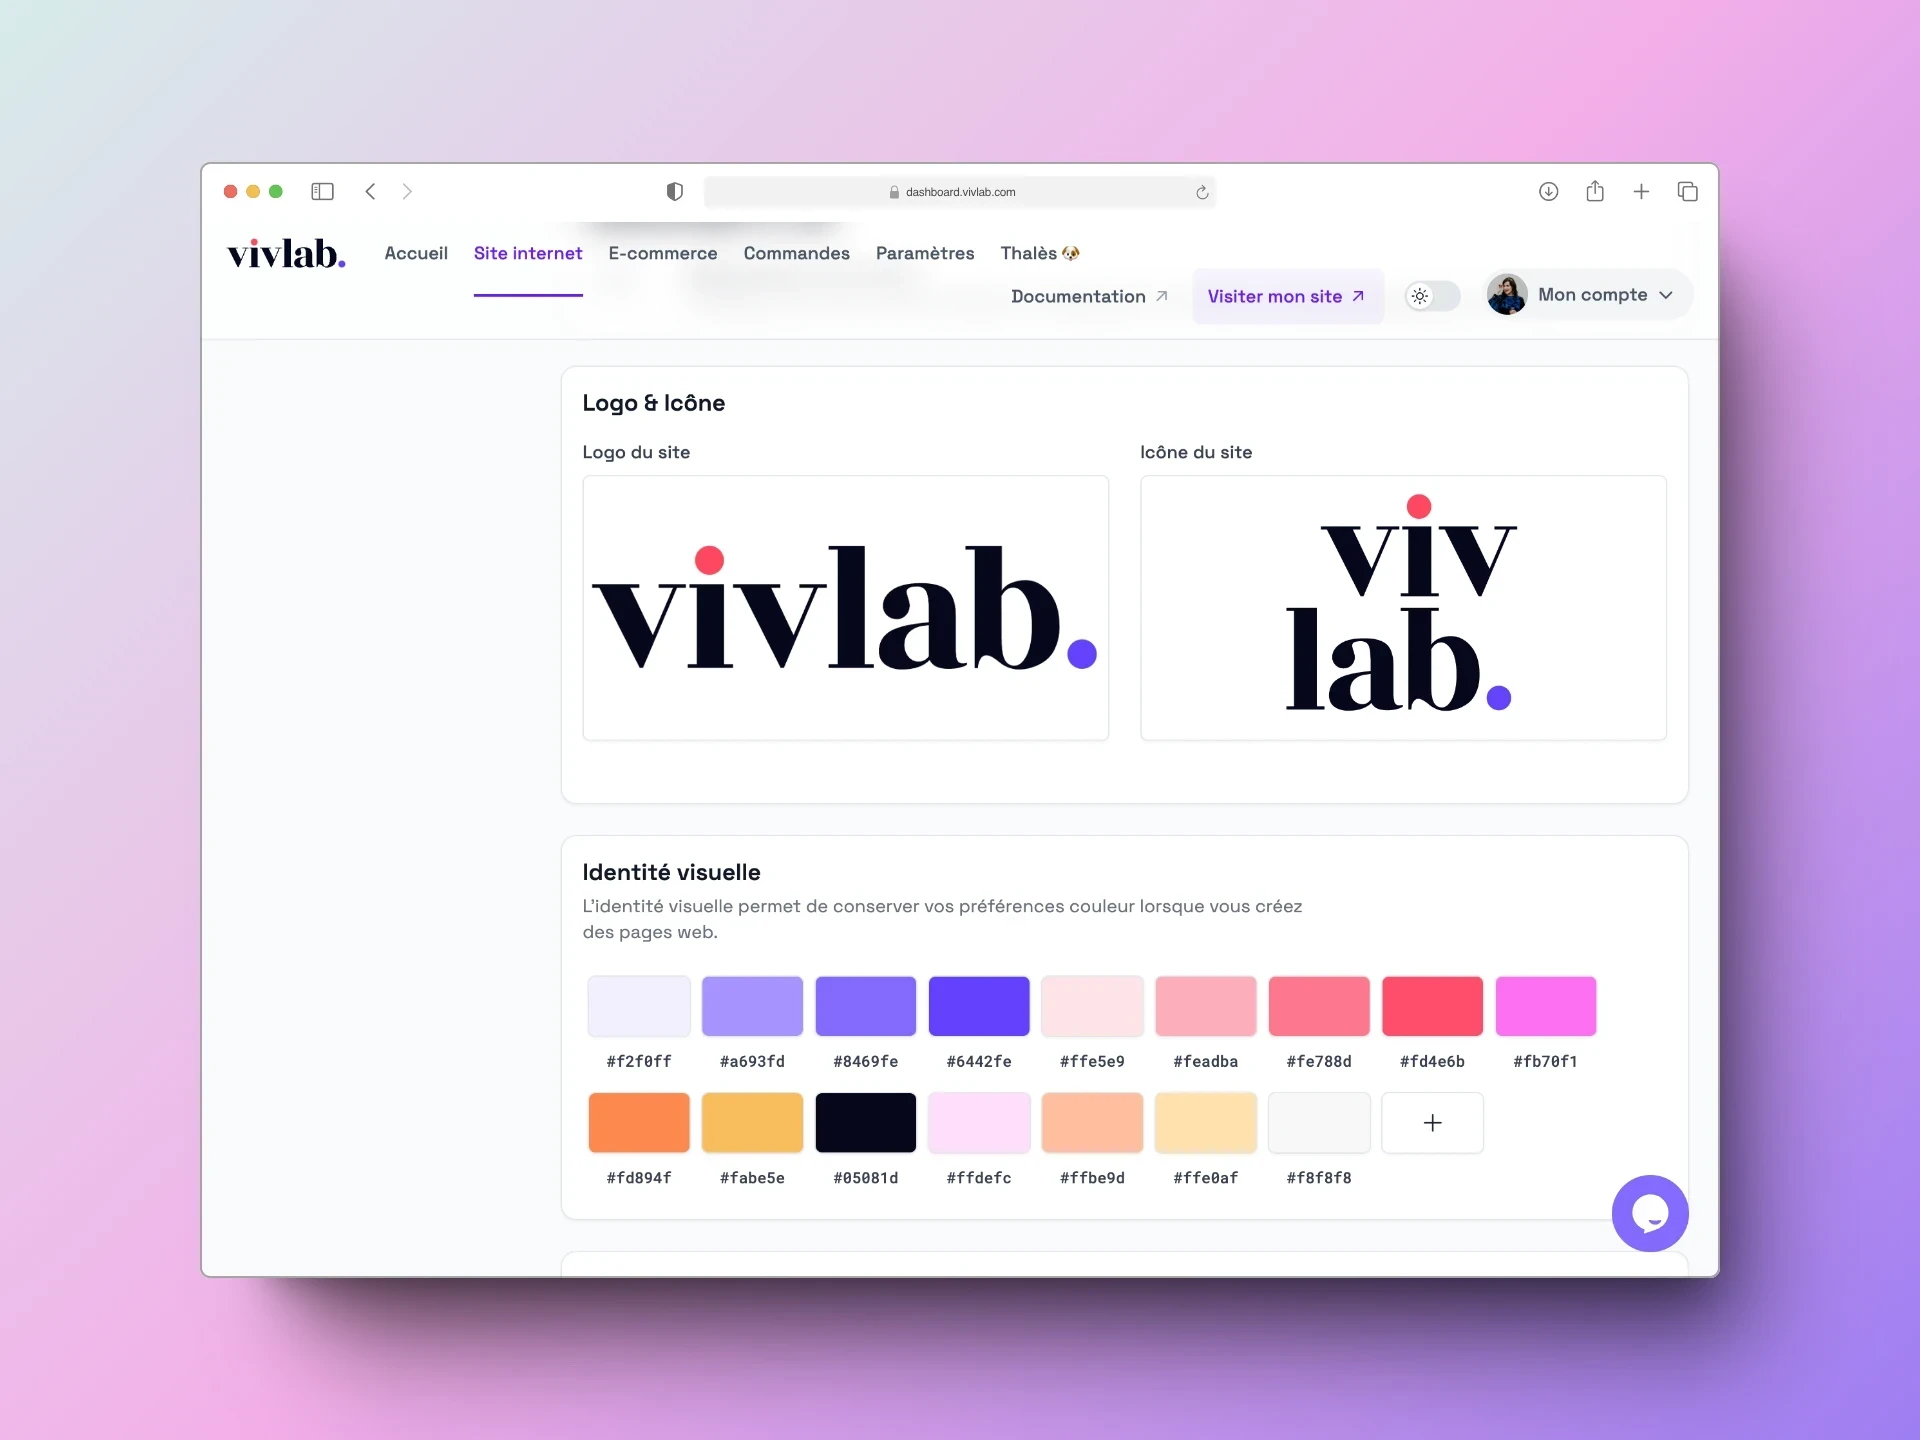
Ajouter mon logo & mon icône
Dans l’encart Logo & icône, téléchargez les éléments graphiques de votre marque.
Suivez ces étapes pour ajouter votre logo et l’icône du site :
Rendez-vous dans l’onglet Site internet > Thème.
Repérez Logo et Icône.
Chargez votre logo et l’icône du site.
Ajouter mon logo
Le logo sera visible dans la barre de navigation, dans votre tunnel de paiement et dans les e-mails envoyés automatiquement.
💡 Nous vous conseillons de privilégier un logo sans marge et au format paysage pour une meilleure visibilité.
Ajouter mon icône (favicon)
L’icône est le visuel carré qu’on aperçoit à gauche du titre principal de votre site, dans l’onglet du navigateur. L’image peut paraître pixelisée dans votre tableau de bord puisqu’elle est forcée à 64px, mais elle sera optimale sur les navigateurs Internet.
💡 Il est recommandé de choisir un visuel simple. Elle peut, par exemple, être un élément de votre logo ou la première lettre du nom de votre projet.
Ajouter ma palette de couleurs
La palette de couleurs joue un rôle crucial dans la création et le respect de l'identité visuelle de votre marque sur votre site web. Elle vous permet de retrouver vos préférences de couleurs lors de la création de vos pages.
Suivez ces étapes pour ajouter vos couleurs :
Cliquez sur le bouton [+].
Renseignez le code couleur au format hexadecimal (#HEX) ou via la roue des couleurs.
Répétez l'opération autant de fois que nécessaire.
Pour supprimer une couleur, passez la souris dessus et cliquez sur la petite croix qui apparait.
Personnaliser mes polices d’écriture
Tout comme les couleurs, définir les polices d'écriture vous permet d'assurer le respect de votre univers de marque sur votre site. Vous pouvez ainsi retrouver vos préférences lors de la création de vos pages.
Suivez ces étapes pour ajouter vos polices :
Cliquez sur le bouton d'une police pour la personnaliser.
Sélectionnez votre police parmi celles proposées par Google Fonts (libres de droit) ou chargez le fichier de votre police.
Vous pouvez ajouter jusqu'à 4 polices, correspondant aux types de texte suivant :
Titre 1 (H1)
Titre 2 (H2)
Bouton
Paragraphe
💡 Vos préférences de police sont appliquées par défaut aux contenus textes de vos pages vitrine, mais vous pouvez les personnaliser à votre volonté.
Personnaliser les formes & couleurs
Personnalisez le thème général de votre site en sélectionnant vos préférences de formes et de couleurs d’accentuation.
Formes des boutons : choisissez la forme des boutons de votre site en déroulant le menu de sélection.
Couleur d’accentuation : choisissez de préférence une couleur vive qui contraste avec le blanc pour une bonne visibilité.